I have suddenly realised that I have an assignment due in the week (bah!) for which I have not done any work at all. Therefore, sewing this week is probably not going to be happening. Accordingly I shall instead amuse/confuse you all with some random posts about work that I did on my crazy architecture course.
I shall start with a arm gauntlet thing that I made out of pvc as part of a "viewing" device (the idea was you looked through the slides you put on top which had words on them , and you saw things differently. Clearly this was more conceptual than anything else. It was part of a group project which also saw my friend Imogen construct a submariner style helmet that made her look like a robot.
(The image is a scan from my thesis report, which I would explain but I'm not sure I understand it anymore! it was very conceptual and odd.)
Monday, 28 February 2011
Saturday, 26 February 2011
Paper tape dress form - phase 1!
This post used to be a lot longer, but I deleted it and don't seem to have kept a copy. So I'm recapping now so people can replicate the sheer madness involved in this! I hope you guys know how much I'm doing for you here though as these pictures are truly horrible and they pain me considerably!
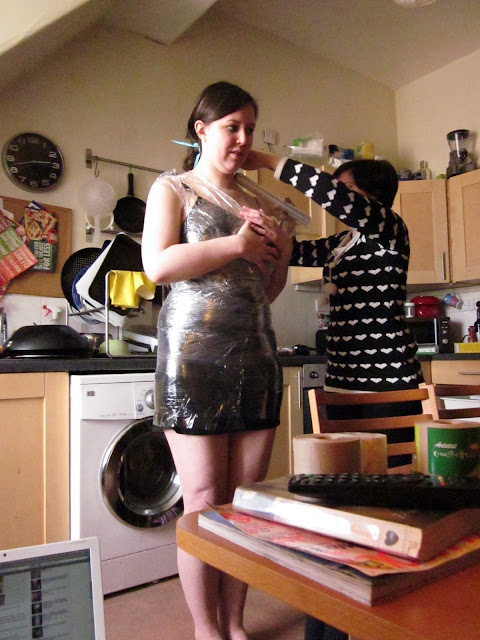
I wanted a personalised dressform. To fit me exactly. Now there are various ways of doing this, but I decided to go with the gummed paper tape approach, as this allows the form to keep its shape as the paper sets to a rigid shape.
Now in theory this is very straightforward. You wear as few clothes as possible, wrap yourself in clingfilm so that it doesn't stick to you and then wrap wet strips of the tape around you. Once you have done a few layers you wait about half an hour until its dry and then cut it off -instant dressform!
In reality - its not quite as easy as all that! You need at least one helper to wrap you up in the tape - it's not possible to do it yourself. As you get quite restricted after a while you could also do with another helper to cut and wet the tape.
It is also completely hilarious to do! Having anyone smooth wet tape over your whole torso for an hour or so is rather intimate. You have to be very careful as well as you don't want to squash any parts as then it wont be accurate.
But it is very effective! Having said that - it is hideous, and has holes in it and you cant pin in to it. After I completed this stage I went on to some further steps to make it better -see my next post.
I shall leave you with some pictures of the general hilarity!
Labels:
dress form
Monday, 21 February 2011
Wildflower Skirt-complete!
I finished something!
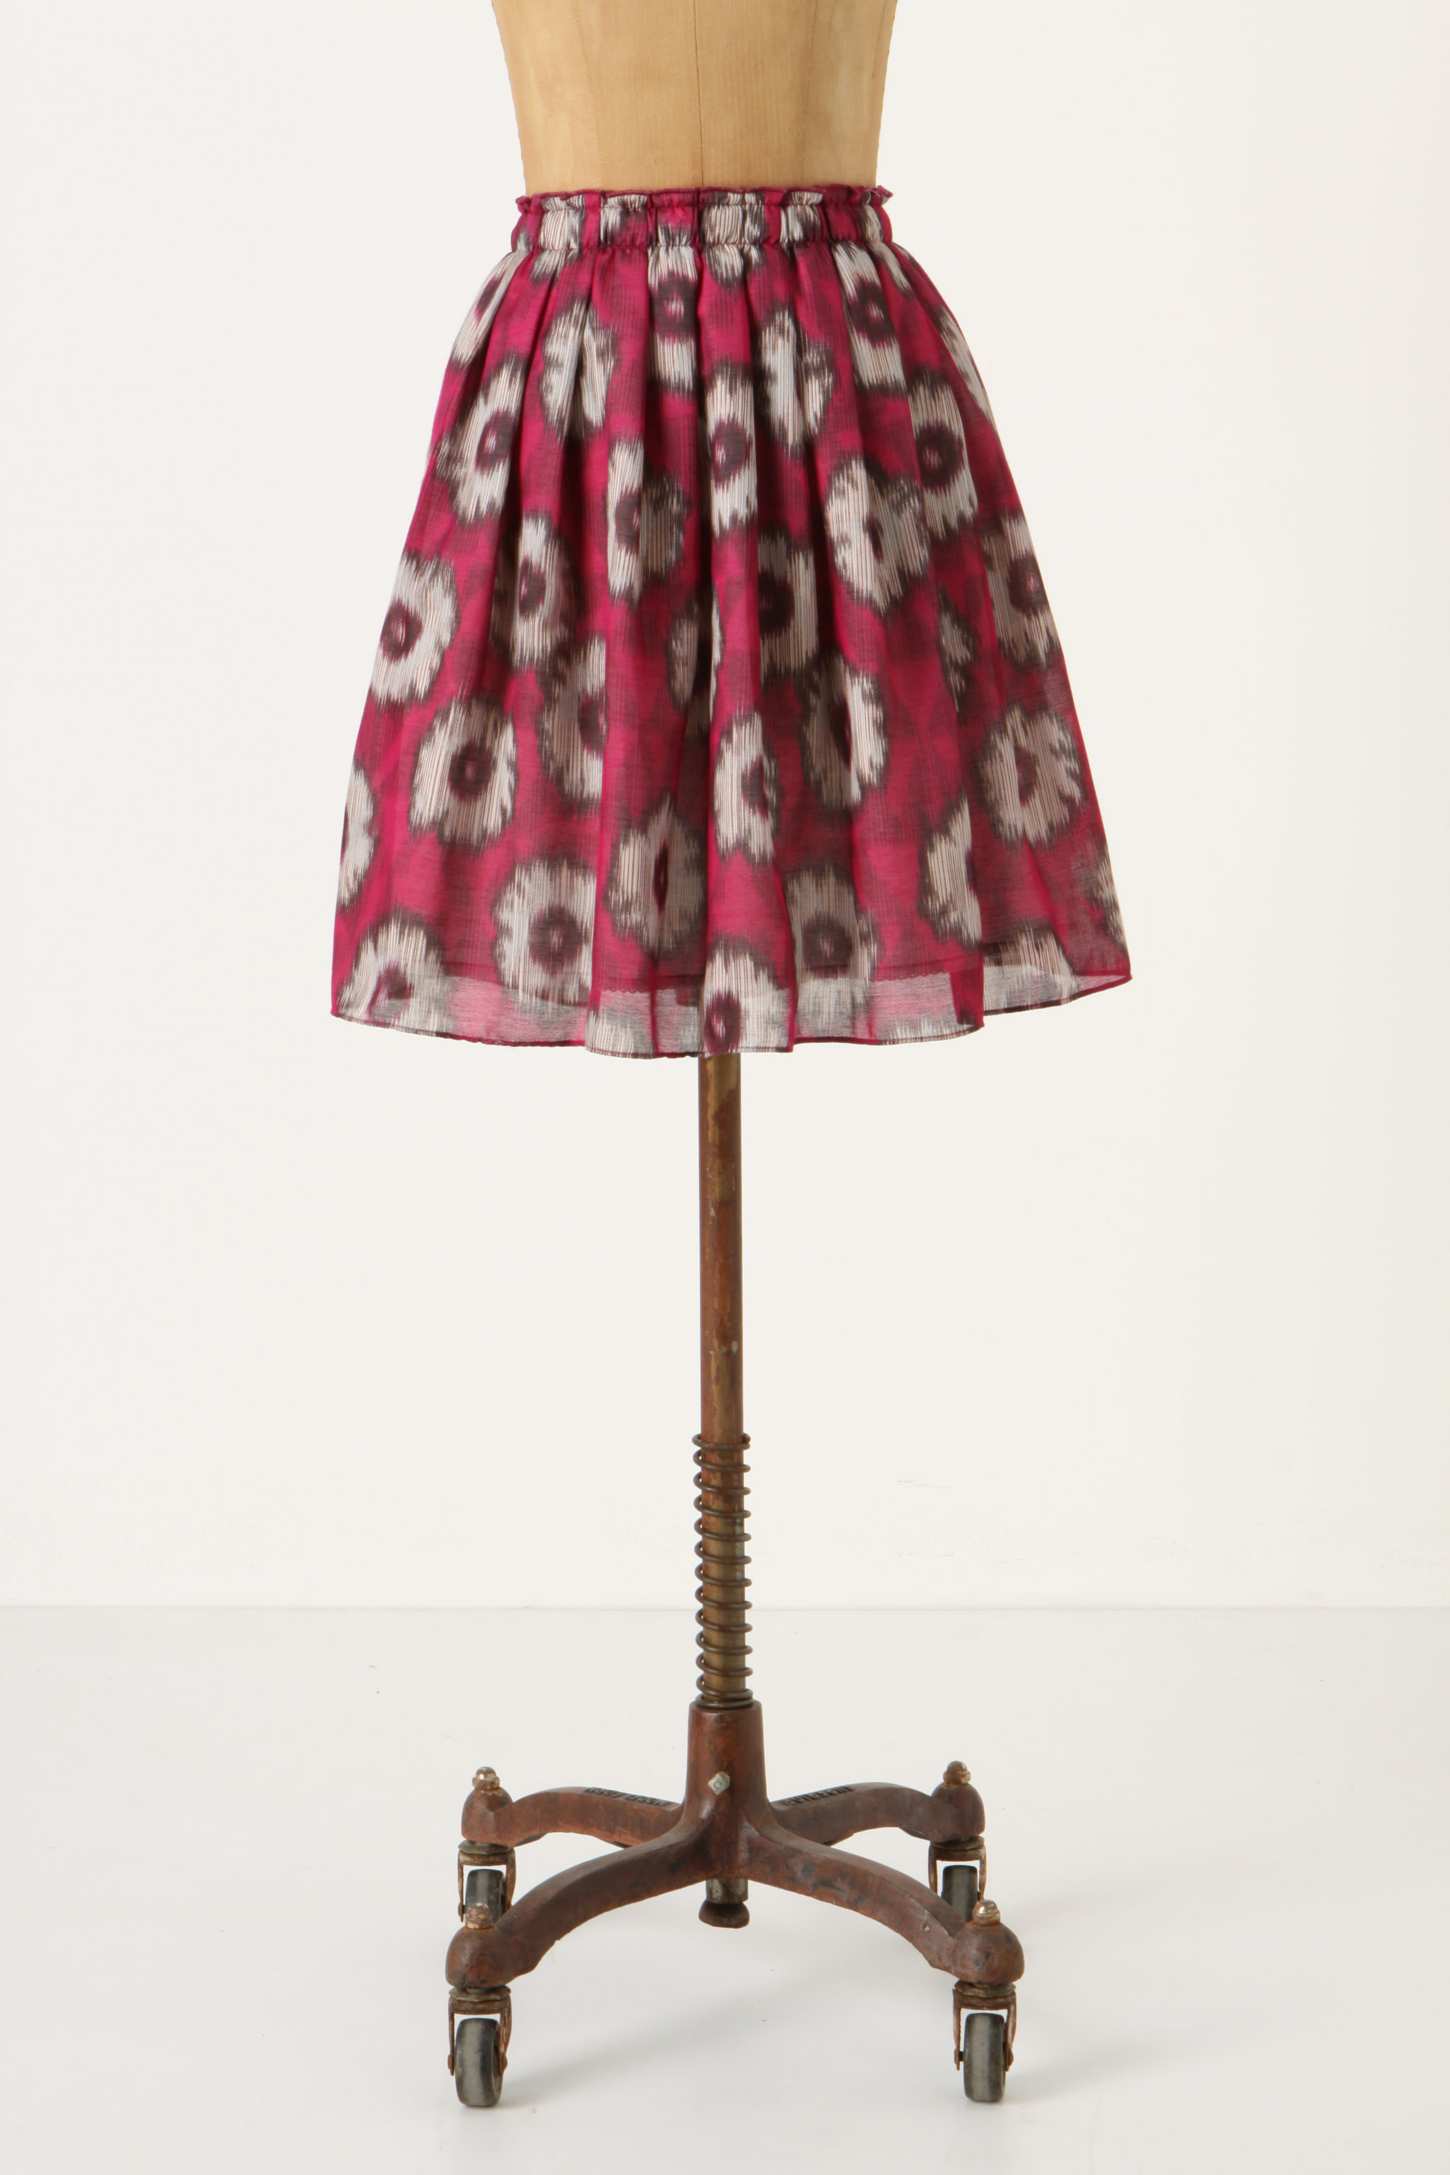
This skirt is the first part of the Spring Palette Challenge, and is very simple, just an A-line. I wore it to wander round Edinburgh with my friend Srobana who was visiting me.
You cant really see the shape too well due to it being really windy! I really like it though. Its very comfortable, really jolly and despite creasing quite easily the creases aren't really visible. Result. I wore it all day and then out for drinking and it stood up well. I was worried the pattern might be a bit much but I think it works nicely. The one with my woolly hat shows the drape of the skirt better.
Labels:
Spring Palette
Friday, 18 February 2011
Pendrell Homage-2nd muslin
Well I finally got round to altering my pattern pieces. I mainly took a few inches off each seam below bust point. I also took some small tucks out of the neck, and did a sway back adjustment (thanks miss p for suggesting it!).
I sewed up another muslin with my new pattern and its MUCH better! I actually look like my actual shape! I also attached the sleeves.
Certain things are clearly off however - I should have realised that after taking all the width out of the waist and doing the sway back that I would have to add it back in a the hip area. The front is fine but the back needs another 4 inches at the bottom hem -oops! when I add it back in the bottom should hang a lot better. I think looking at the pictures, I did the sway back slightly too low, if I move it up an inch higher and then add the additional width below, it should all be better. (the wrinkles under the bust at the front are actually mainly creases as I tried to get it over my head without undoing the bottom back fastener and got stuck (thanks Charlotte for rescuing me).
Despite my taking tucks out of the neckline, its still very gapey, so I will have to take more out.
So overall it's looking pretty good, but now I have the sleeves to contend with. I managed to set them in better than usual, I think I'm finally getting the hang of it -no weird tucks after I get the gathering wrong! (I know its not difficult, it just seems to be one of the things that foxes me!). Clearly I did something very wrong on the Christmas dress, as I actually made the sleeves smaller this time, but they look and feel massive! I'm going to have to take them in and up quite substantially. They sit in well though, and in about the right place. (EDIT-I've just realised what happened, I took the seam allwoance off the bodice peices but didn't bother when I got to the sleeves as I was using the original pattern piece.. I am such a chump! still, mystery solved...doh)
All in all I'm pretty pleased, it's a massive improvement on the previous baggy effort. I think it probably ought to be a bit longer but I don't think I am going to have enough material.
I now just have to work out the facings and neck ruffles.
Here are my pieces laid out (obviously there would be two sleeves). It is a bit tight length wise, so I'm not sure I am going to be able to make it longer. But there does seem to be enough left for the facings and ruffles so its all good. I'm glad it's finally coming together, I think this may have been a few challenges too far for my enthusiasm levels!
Labels:
Pendrell
Thursday, 17 February 2011
Glee bow construction
Well its been about a million years, but I finally got round to finishing the Glee Dress (I think-I still have to check it on her as its been a while!)! I had tacked it all together for Charlotte to wear to our Christmas meal party, but then got distracted and hadn't finished it. The main thing to complete was the bow.
In case you've forgotten, here is Rachel wearing one in Glee
Now I had to make mine up as I went along and consequently its a little scrappy from the back! It could also do with an iron now I've finished it-but never mind-time for photos.
Firstly I ironed some fusible interfacing onto the back of my fabric. Then I cut it into three pieces, two pieces about twice as wide as the finished bow should be, and twice as deep, and one twice as long and wide as the middle part of the bow. Then I sewed them into long tubes.
For the main part of the bow, I took one of the long tubes and sewed the ends together to make a loop. I then wrapped the small tube round the middle, arranging the folds, and then sewed the ends down.
For the ends of the bow, I cut the tube in half on a diagonal, to end up with two pieces, which I turned inside out, hemmed the pointy ends, then turned back out and hemmed the other end that wont be visible. .
I then worked out the folds with pins (not very symmetrically as it turned out!) and sewed the folds in on the back by hand.
Then I sewed them onto the back of the bow by hand. I initially sewed them on the wrong way round (thats what comes of not looking at the picture!).
So that the bow can be detached from the dress for washing (and if Charlotte wants to wear it without it) I sewed on three brooch back pins.
And there you have it. In an ideal world I would have made it far more symmetrical!
Labels:
Glee dress
Wednesday, 16 February 2011
I am finishing stuff-honest!
I seem to have a problem finishing things. But I have been trying this week to overcome this urge and finish things off. Due to the terrible light condition's of late, I have been waiting for photographs for daylight! Never the less, the Wildflower skirt is done and the Glee dress is pretty much finished.
Just been over at the Colette Patterns forum and one of the lovely members called Ladykatza posted this quote as her signature If you are afraid to make a mistake, afraid to ruin some fabric, or afraid to waste some time, you won’t ever get really good at this craft. It’s the dues you pay for becoming proficient. - Kenneth D King.
I don't think I've ever heard anything more true, or that I find harder to live by! I am always afraid that I am not good enough to do things justice and hence don't dare get to the point where I find out. But I will try to get better!
Also, Colette have made up some gorgeous versions of the wrap dress Crepe, and one of them is pretty much exactly the dress I always wanted as a child! (not sure my tastes have changed that much really!)
 |
| Look! It exists! It also looks far more shapely on me! |
I don't think I've ever heard anything more true, or that I find harder to live by! I am always afraid that I am not good enough to do things justice and hence don't dare get to the point where I find out. But I will try to get better!
Also, Colette have made up some gorgeous versions of the wrap dress Crepe, and one of them is pretty much exactly the dress I always wanted as a child! (not sure my tastes have changed that much really!)
Tuesday, 15 February 2011
Spring Palette Challenge (a bit late but never mind!)
I have been really enjoying looking at other people's palettes for the Colette Patterns Spring Palette Challenge. The idea is to pick a palette of colours that are inspiring you right now and create a little wardrobe of outfits and items that use these colours. I have been holding off because I seem to be loving all sorts of colours at the moment but then I realised that whilst I was enjoying the colours, I kept trying to make things in a much more restricted palette-so I had a go at making my selection and working out the projects. Though I'm a little late on the challenge, some of the projects I have already been working on are part of the plan so it is all fine!
I am planning to make 7 items, using shades of blue and purple and white as a contrast. That sounds rather a lot, but two of them are only belts so should hopefully come together quickly! Plus I originally had 8 items, but a gathered 50s blouse in white with turquoise flowers got cut at the last minute as I was in danger of biting off far more than I can chew! Having said that it might come back in again if I fancy it!
Obviously my Pendrell homage (should I ever get round to finishing it-I have slipped a little on the sew-a-long time frame!) is included, and the Chuck dress. I had this Challenge in mind when I selected the Wildflower skirt fabric and I am going to refashion the turquoise jersey sarong/wrap skirt I mentioned here. In addition to these I am planning an Oolong (great name-I've looked it up just now and its a kind of special Chinese tea) by Colette Patterns, a bias cut dress. It's quite a dressy pattern as its been made up by them, but I'm going to do a more worky/everyday version by making the bodice from white and bottom from navy.
 |
| Sadly I don't know where I got half these from but some are form modcloth, the Pendrell blouse is obviously Sewaholic, the blue gathered front skirt is by Casey, and the red belt is Tilly's. |
Obviously my Pendrell homage (should I ever get round to finishing it-I have slipped a little on the sew-a-long time frame!) is included, and the Chuck dress. I had this Challenge in mind when I selected the Wildflower skirt fabric and I am going to refashion the turquoise jersey sarong/wrap skirt I mentioned here. In addition to these I am planning an Oolong (great name-I've looked it up just now and its a kind of special Chinese tea) by Colette Patterns, a bias cut dress. It's quite a dressy pattern as its been made up by them, but I'm going to do a more worky/everyday version by making the bodice from white and bottom from navy.
Labels:
Spring Palette
Thursday, 10 February 2011
I own pinking shears!
I took a little wander to John Lewis to have a look at their haberdashery (I do love a little haberdashery!) and whilst my enthusiasm for their fabric was slightly dinted by the realisation that they had my Amy Butler fabric on sale (GRRR!) I was drawn to the scissor rack. I splurged on some pinking shears! I'm very excited! I've never owned any before and I hate everything unravelling off everywhere, and now such things are of the past! I also got some proper tailors chalk as my pencils are driving me mad.
My skirt is all sewed together, barring the fact that I seem to have lost all my hooks and eyes somewhere so I shall have to get some more to finish the waistband (I'm having to bodge it as I somehow managed to cut the waistband too small (I seriously don't know what the matter with me is-I measured it several times!). It is now hanging up to stretch out before I hem it up.
My skirt is all sewed together, barring the fact that I seem to have lost all my hooks and eyes somewhere so I shall have to get some more to finish the waistband (I'm having to bodge it as I somehow managed to cut the waistband too small (I seriously don't know what the matter with me is-I measured it several times!). It is now hanging up to stretch out before I hem it up.
Wednesday, 9 February 2011
Progress on Wildflowers skirt
Well I sized up my pattern and cut into my Amy Butler fabric whist watching TV after work. All went quite well really, apart from me having a little mental blip about wearing ease etc. The pattern doesn't have the instructions, and while they really aren't needed as it such a simple pattern, that didn't stop me confusing myself as how the waistband is meant to attach! Also oddly there seems to be an additional strange triangular piece for the longest skirt that I really cant account for-luckily not needed for my skirt!
Here are my pieces. As you can see if have made the classic big print error of lining up a flower right in the middle, but luckily the other piece is not the same so that can be the front!
I'm pretty pleased with how the print has worked out, I was worried it might be too big, but I think it's going to be great!
Tuesday, 8 February 2011
Trying to get out of a rut
I don't know, something about doing all my muslins recently and fiddling with paper patterns and alterations and reference books has left me in a bit of a rut. I have slightly lost enthusiasm for sewing. It is that typical "I haven't actually finished anything in aaaaages" problem. Clearly I need an easier challenge to get me going again, and one which will be finished super quickly and hopefully without drama!
I planned to make a circle skirt using Casey's vintage tutorial, and correspondingly made my first on-line fabric purchase! I went to Gone to Earth looking for fabric (and also a copy of Collete's Oolong -clearly even contemplating an easy project has made my more ambitious again!) and picked up some lovely Amy Butler fabric -I really enjoy a big bright pattern, and as my friends know I am very partial to blues and turquoise!
Sadly, being a chump of the highest order I didn't order enough fabric to make the circle skirt (I really don't know what's wrong with me sometimes!) I am half a metre too short. FAIL. So, I decided to use one of my existing patterns to make a slightly less full skirt out of my 2 metres.
Take two-now I am working with Style 1025, a vintage skirt pattern that my lovely mummy gave me when I first got my sewing machine. It's very simple, just a 2 piece flared skirt cut on the bias. No frills, so hopefully no spills (I know I know, famous last words-this hassle free project has already become slightly over drama filled!)
I will be making version 2, the knee length one. I assumed I would make option 3 as the picture shows a nice length, but apparently those drawn ladies are really short as version 3 is practically a mini on me. Its not exactly the project I initially planned, but I think it will work well, as it is probably better that the big pattern is less distorted by folds.
I planned to make a circle skirt using Casey's vintage tutorial, and correspondingly made my first on-line fabric purchase! I went to Gone to Earth looking for fabric (and also a copy of Collete's Oolong -clearly even contemplating an easy project has made my more ambitious again!) and picked up some lovely Amy Butler fabric -I really enjoy a big bright pattern, and as my friends know I am very partial to blues and turquoise!
Sadly, being a chump of the highest order I didn't order enough fabric to make the circle skirt (I really don't know what's wrong with me sometimes!) I am half a metre too short. FAIL. So, I decided to use one of my existing patterns to make a slightly less full skirt out of my 2 metres.
Take two-now I am working with Style 1025, a vintage skirt pattern that my lovely mummy gave me when I first got my sewing machine. It's very simple, just a 2 piece flared skirt cut on the bias. No frills, so hopefully no spills (I know I know, famous last words-this hassle free project has already become slightly over drama filled!)
Monday, 7 February 2011
Inspiration: pleats and gathers
In between hacking my various patterns about (progress on these is happening I promise!) I've been getting intrigued by gathers and pleats. Now I am in general not really skilled enough to pull these off in most instances but they can be so pretty and interesting.
Doing a cruise round modcloth and etsy (among other places!) I found lots of beautiful outfits which manipulate fabric through added volume and lines in very different ways.
Lovely contrast between the tightly constructed bodice detail and tiny pleats with the loose gathered double layer skirt.
Doing a cruise round modcloth and etsy (among other places!) I found lots of beautiful outfits which manipulate fabric through added volume and lines in very different ways.
Give Me S'more Dress from modcloth
It's just so cute! I love the stiff neat minipleats on the skirt that then flare out, and the smooth pleaty details on the top are lovely. It's a dress with a lot going on which still manages to look simple.
Kennebunkport Dress in Wake from modcloth
I love that the pleats look like they go all the way down from the neckline as smooth flat pleats to the fuller skirt.
I love that the pleats look like they go all the way down from the neckline as smooth flat pleats to the fuller skirt.
A simple pleated skirt, but where the pleats go over the waistband. Looks very simple but would be very difficult to get neat!
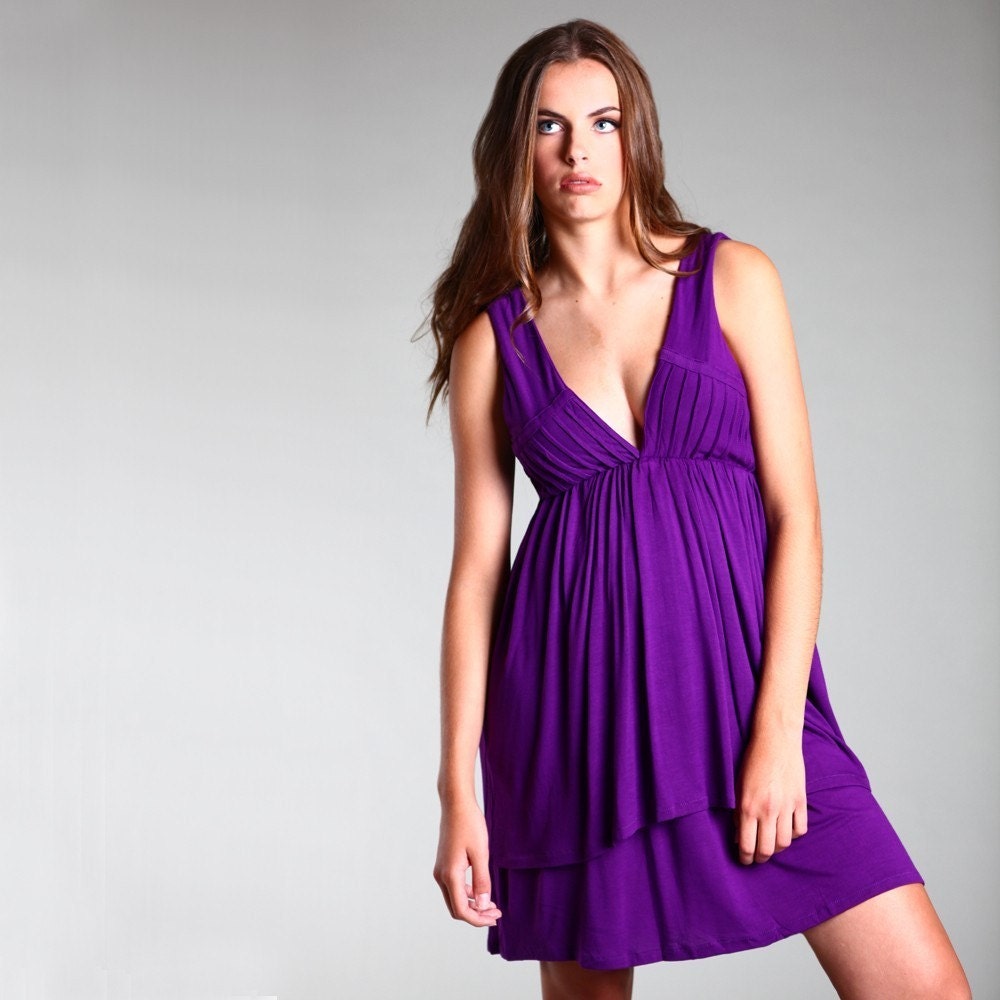
Portrait of a Siren bamboo jersey dress by GinaMicheleEco on etsy
Beautiful clean lines and drape.
Pleated Neckline Dress With Ruffled Sleeves by Lirola on Etsy
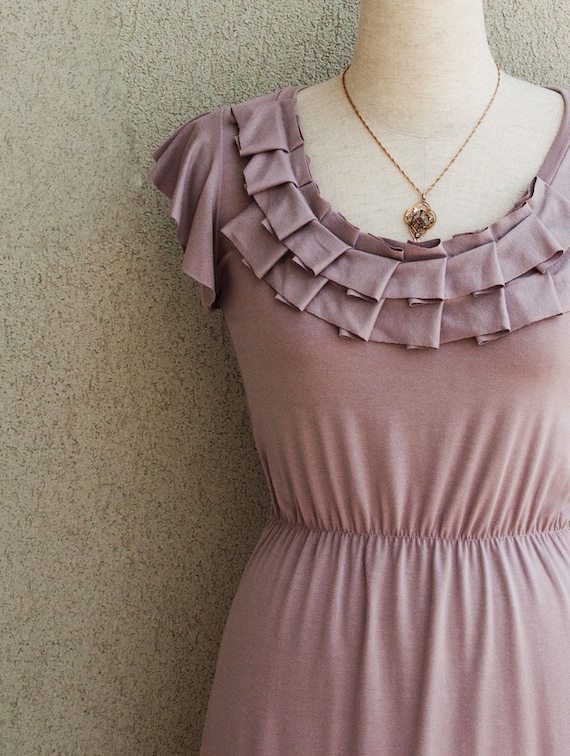
Lirola does some lovely drapey jersey items, but I like that the neckline on this is far more structured and textural. It also uses the fabulous property of jersey-ie that it doesn't need hemming, to have cut edges that make it look like it's been left halfway through construction of a more complicated garment. I also like the contrast between the constructed neckline and the very simple elasticated waist , normally I'm not a fan of elastic done like this but its been done so well it really works.
and to finish off - a incredible dress by Madeleine Vionnet in 1939, as discussed by Lisa on the Colette Patterns blog
Labels:
inspiration
Saturday, 5 February 2011
Pendrell Homage-muslin
So I took my paper pattern and cut out a muslin. Despite what I said last time, I do appear to have too much fabric round my waist after the FBA. As I predicted based on the Christmas Dress, I again have too much gape at the neckline and it needs a few darts. Other than that it looks pretty good.
The back join however is a bit of a mess. I tacked in where the buttons would go (based on a first guess) and whilst the top is fine the small of my back area is terribly gapey and distorts the whole back of the top. Rats. I'm not sure whether to move a button to this area, or add some snaps in between the buttons.. I would just sew it up and use the buttons as a fake, but its just the problem area that really needs to be able to be opened to get it over my head. I shall have to give it some thought.
The back join however is a bit of a mess. I tacked in where the buttons would go (based on a first guess) and whilst the top is fine the small of my back area is terribly gapey and distorts the whole back of the top. Rats. I'm not sure whether to move a button to this area, or add some snaps in between the buttons.. I would just sew it up and use the buttons as a fake, but its just the problem area that really needs to be able to be opened to get it over my head. I shall have to give it some thought.
Labels:
Pendrell
Friday, 4 February 2011
First stab at the cami
Well based on my muslin I cut out the satin for the cami and sewed it together. I haven't done any of the bias binding yet, in case it doesn't ft.
Now as usual the photo is making it look worse than it is as the silky fabric isn't nearly as shiny as it looks in the picture, and the wrinkles round the waist look quite nice in reality rather than odd! It's still a bit weird round the bust..
Its interesting, for a bit I thought it was a case of having cut too much off and made it too small, but having looked at it a bit longer I think its more a case of not having done quite enough gathering. I think if I take the straps up a little the gathering will sit better.As you can probably also tell I caught the centre of the underbust seam and I will have to unpick that bit.
Its interesting, for a bit I thought it was a case of having cut too much off and made it too small, but having looked at it a bit longer I think its more a case of not having done quite enough gathering. I think if I take the straps up a little the gathering will sit better.As you can probably also tell I caught the centre of the underbust seam and I will have to unpick that bit.
Thursday, 3 February 2011
almost a fashion label
For my birthday my friend Michelle got me some labels with monkeysocks on them to sew into clothes I make! Now I shall just have to make some more as there are loads of them!
Subscribe to:
Comments (Atom)
