
Now you may have noticed that about two months ago I started making a body double dress form to my own measurements. I got my flatmate Charlotte to cover me in brown paper tape, and then we cut it off and I had a model slightly bigger than myself. the whole thing was quite creepy and there are plenty of embarrassing pictures of the whole process in the original post here. Many people stick with that dressform, but it has a few problems, it's slightly bigger than you, as it goes around you, and you can't pin into it. Plus it doesn't exactly look very nice, either generally or in terms of highlighting your every flaw! So I decided to use the method described on Burdastyle to make another model using the first one as a mould.

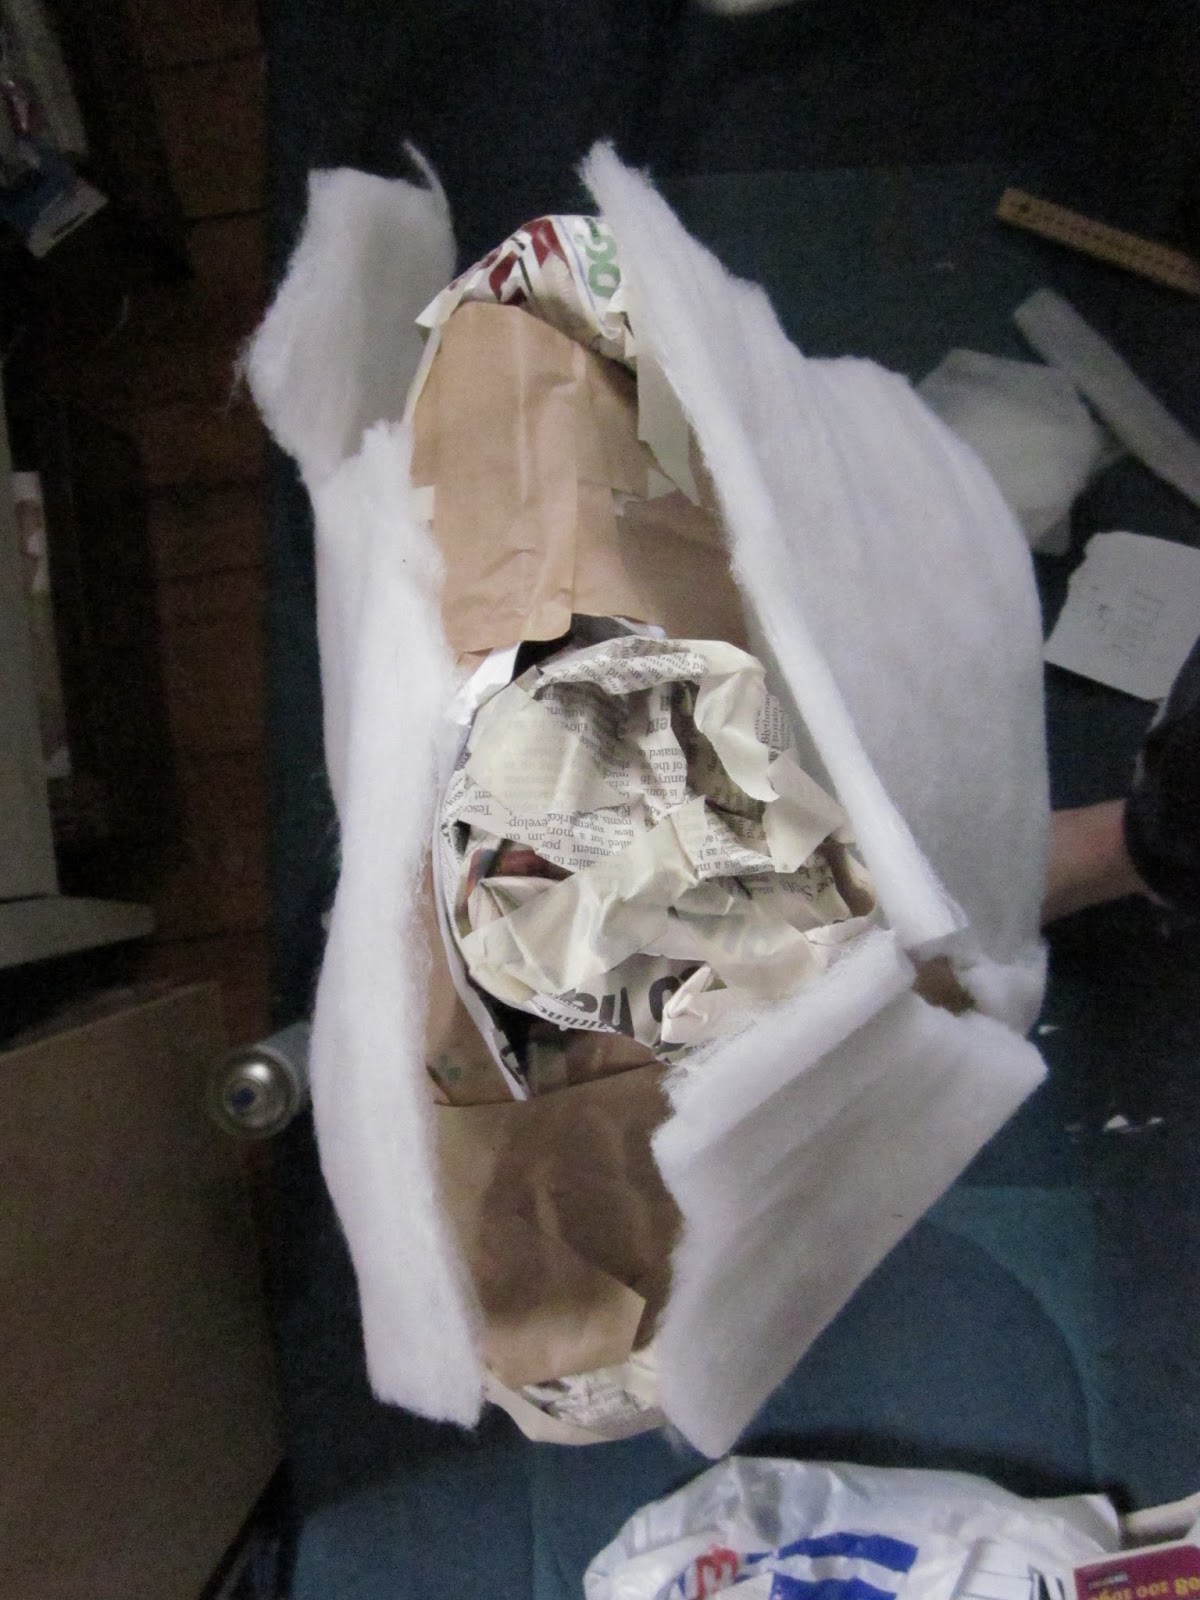
So I started with the first model, and cut it into two pieces down the sides. Here is one of them.

I lined each one with clingfilm, so as to not damage the mould with later wet layers. I then cut pieces of thin wadding and lined the curves of the moulds, this will be the outer pinnable layer, so you have to get it as close to the shape as you can. I sewed it down to the outer mould using big stitches so that it stayed in place.

Then I did another few layers of brown paper tape within the wadding. I found it easiest to go vertically up the body with the strips, so that you can get the curves. It sticks to the wadding as long as you get the first layer of tape quite wet, but not too strongly, do not worry about this you can stick it all down properly at the end. Once I had done a few layers of tape, and the shape is sorted, I made it stronger using some paper mache. The edges were the weakest bit so I put extra layers on there. As the original mould hadn't gone all the way to my shoulders or neck, I extended the inner cast at these points. the two pieces were not that rigid when cut in half so I propped books under them in places to stop them slumping under the weight of the tape.


Once it had all dried, I cut the extra edges off to match the mould, and cut off the stitches holding the two layers together from the outside.
This had all taken about 3 hours in work time, but and well over a month in actual time! (I really need to get better at keeping going with things!) I was pretty excited earlier today when I got to this stage and got to tip out the new pieces! I was slightly worried that it wouldn't have worked. But it came out beautifully!

The next step was to reassemble the pieces. I noted on each where the waist lines were from the old pieces, and lined them up on the two pieces. They had warped a bit when I was making them, so I had to squish them a bit so they lined up again. I then masking taped them together until it fit all round.

I then brown paper taped over the edges to make them strong. At this point the fact that the wadding doesn't stick that well is useful as you can pull it back to get the tape on smoothly.
I rolled up newspaper into balls and used them to make the neck and shoulders. I didn't try and replicate the size of my arms, but just get the shoulder width right. I taped them on and covered them with brown tape.
I took my measurements and checked that the model was the same, which it was, except at the bust. I had clearly got a little squashed during the taping process. At this point the base was done, but the wadding was falling off and had lots of gaps. I cut pieces to fill in the gaps, and stuck them and the rest of the wadding on with spray glue. I cut extra pieces to puff up the bust area to match my measurements.
I then had to cover it. I couldn't find any instructions online, other than to cover it with a long sleeved jersey top. I didn't want to do that, so I used some light blue jersey fabric and made it up as a I went along! I pinned it to the front first, sticking the pins through the weaker side joins. I toyed momentarily with putting darts in when the stretch wasn't enough, but quickly decided that wold be to difficult and I would just fold it.
I then put on the back piece, folding it over at the joins and sewing it along the edges. I started at the top as that was the fiddliest bit and would give me a sound base for the rest.

I then pinned the side seams, and sewed them too. The stitching could be much neater, but it was rather fiddly getting it tight enough, plus I'm terrible at hand sewing!
As I am planning on finding/making /bodging some kind of stand for it, I left the bottom open and pinned the excess fabric up inside. Luckily however it stands up fine as it is.

It's very weird looking at her. She is definitely rather pneumatic looking! But I am very pleased! Here is me hugging her. Most people cannot say they have properly hugged themselves!
UPDATE I eventually put her on a stand and she looks great! (See more here).

He he, love it!!
ReplyDeletePx
Very impressive. Thanks for showing the process.
ReplyDelete