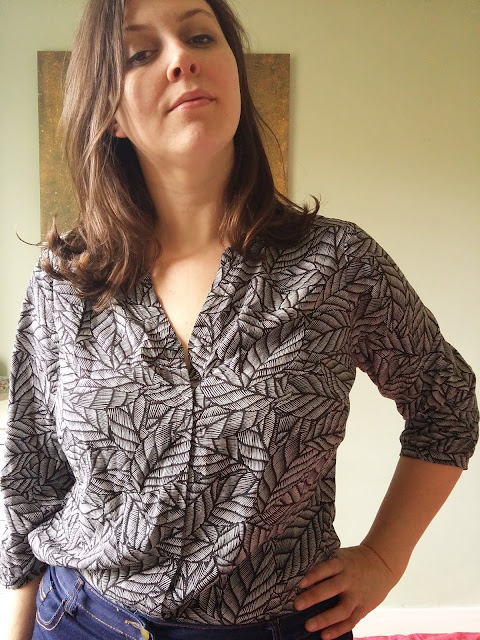
I made a jacket! I've never previously tried making a proper
coat, not particularly because I was intimidated by the skill involved (though
I would find that hard) but because I don't tend to have the attention span for
large complex projects. I am becoming more ruthless (and honest with myself) and
I know that if I can't, If I can finish a project in a day, maybe with some
follow up time, say a weekend, I’m not going to make it, because I won't finish
it.
Thankfully, this is actually an extremely easy pattern and
very quick! It's the Cambria Duster by the Friday Pattern Company. I was
considering making a duster, and I looked on The Foldline (an online sewing
pattern database) and just loved this one right away! It has side ties that can either be worn loose (see above), tied at the front (see below), or tied behind (see further below) for three different looks. It has a large front collar/lapel/facing thing that makes it very elegaant and flexible.
I made my life difficult by forgetting a few steps and I did
a lot of hand sewing but even then I could have sewed the whole thing in a few
hours had a chosen to.
Fabric
The main issue I had was fabric availability. When at home
at the bank holiday recently, I was rummaging through my mum's extensive fabric
stash (other people do this too right?) and spotted this perfect navy fabric. I
think it's some kind of thin twill - it's got a woven in texture and was
probably made for thin curtaining. (I think Mum was using it for a sturdy bag
lining). Not sure about composition- it's cool and soft and holds a crease ok
when ironed but is not too creasy in general. It was also very easy to work
with, despite being in theory quite slippery, so overall an excellent lucky
choice!
Cutting out
So far, so good. The snag came when I bought the Cambria and
realised it asked for almost 5m of fabric at my width. I did not have that
much. I had maybe 2.75m?
That's never stopped me though (I never seem to buy enough
fabric-plus proper cutting layouts always leave so many weird shaped pieces!).
I was reflecting on Instagram the other day that while I hate cutting out
fabric, I really get a kick out of pattern Tetris (ie fitting it all onto an
impossibly small/odd shaped piece)! On this occasion it was really quite tricky
and took several hours of reconfiguration to work out (told you I enjoyed it!),
possibly a similar amount of time to the actual sewing!
 |
| (Not the final layout!) |
The only reason it was
possible is that the Cambria is made in panels. Apart from the front lapel
pieces (which are big bits you need 4 of, the primary reason you need so much
fabric), it's all cut into two at a waist seam. Those front lapels/facings also
attach to a princess seam down the front, which allows you to sew the inner bit
in neatly (as it may be seen). I realised however that all these seams are
actually pretty straight, so I just overlapped all those pieces a d cut them as
one, saving loads of seam allowance. I also shortened the coat by a few
inches. To get it all to fit I did need to cut the font facing bit (that makes
the lapels) upside down, but the pattern isn't really directional so that was
fine.
Sacrifices did have to be made - I couldn't fit the patch
pockets, or the ties. I found some similar colour fabric and made a side seam
pocket instead. For the ties, I pieced them together from the scraps. These
were all pretty small and so each tie has 5+ different scraps - they probably
took longer than most of the coat! At the end, I didn't have any scraps bigger
than my hand, and most much smaller so I'm calling this as an almost zero waste
project!
Sewing
As I mentioned, the sewing was very quick. This is a very
well designed straightforward pattern. I had also saved myself a lot of time by
my cutting - about half the steps are sewing together the panels that just cut
as one (I'm actually not really sure why they aren't like that anyway). The
only tricky bit is a neck seam where you sew the whole lapel/collar bit on. I
could not get that to look right at all, however it's not visible at all as the
collar covers it completely so who cares! The inside of this area I just
handstitched so that looks fine.
 |
| The awkward seam (I had to move the collar to show it) |
As I had not cut that front princess seam, I had to handsew
down the fill length of the inner facing but this was very easy and I found it
quite satisfying. I then did the same for the hem and sleeves. It wasn't clear
if I was meant to top/edge stitch round the collar but I did to make the edge
sharper.
 |
| (No show inside facing seam) |
Overall I love it! It looks very slick for something that
was so easy, and I can imagine it getting a good amount of wear.
Thoughts on fit
I forget what size I made, but it was the size my
measurements recommended. I didn't make any fit adjustments, except to lengthen
the sleeves slightly (the pattern ones didn't look quite full length to me).
I
would say (and this seems to be similar to what other people gave found) that
this coat is not roomy through the back and shoulders. Given a magic wand I
would give myself another inch across the back for sitting/reaching. The
sleeves are also snugger than I might have expected for a jacket, particularly
through the shoulder/arm scye - I wouldn't be able to wear this easily over a
medium/thick jumper. Luckily I don't really own any, so not a huge issue for
me, but if you want more space then add more ease.
Overall I am very pleased!


