Wednesday, 21 December 2011
Reflection on a year of sewing.. I am still not very good at it.
As I prepare for my "100th post, about a year since starting a blog, at the end of 2011 and around 50 followers" post round up, I have to say that this year has definitely been a year of errors. Pretty much the first thing I did with my new sewing machine was put the needle in and wedge my finger somehow under the feeddogs with the needle embedded in it, with the only resource pushing it in much further so I could get the right angle to get it out. Ow. Since then I have proved I have a talent for cutting the wrong bit off things, cutting out small pattern pieces from the middle of bigger ones (when I had no spare fabric to fix it of course) and my personal and ongoing favourite, sewing the front of something to the back that I've accidentally got caught underneath. I misread instructions, don't measure the grain-lines, melt my non fusible interfacing trying to make it stick to things, forget to plug the iron in and think its broken, insist on doing everything in half the time it ought to take and forget if I have included seam allowances. But still, I thought I was halfway competent, until last night.. I am making my flatmates a skirt each for Christmas, and I had rattled through most of an orange pencil skirt for Lindsey and needed her to try it on to see if it fit. I therefore threw in the zip, with remarkable ease and pretty straight for a first try. I was quite pleased. Until she tried to try it on. I had sewed the zip in UPSIDE DOWN. with the pull at the bottom and the unopenable bit at the waist. Brilliant. Sometimes the mind just boggles.
Luckily the thing needed taking out a bit anyway as I hadn't added enough ease for her to sit down properly, so I would have had to re-do it anyway. No harm done. Except to my ego and view of myself as a person with 2 braincells to rub together!
Despite all these flaws and idiocies and mistakes, I still love sewing, and working out how to make things fit together and fit people. One of the things Hannah took away from our recent sewing lesson was that most mistakes are fixable, and teach you something, and I really like that about sewing (though I am not sure what I have learned form the zip incident, except not to be a numpty!).
Even with all my mistakes, I am still very unafraid to sew and try new things. Maybe it is because of them-I can clearly mess up something up if I have done it 30 times just as easily as something new! Some times new stuff is tricky and you aren't sure about the end result, like FBAs (I still can't get the flat pattern versions to work properly) and others it is glorious and brilliant, like my bias strip maker! Last night after my depressing zip low point, I had a fun high from trying my first self covered buttons! A bit fiddly getting the material to hook on but then they just clicked in and looked like proper buttons - awesome!
How about you guys-do you find that the mistakes make you question your sanity? or spur you on to learn more?
Monday, 5 December 2011
Bunting!
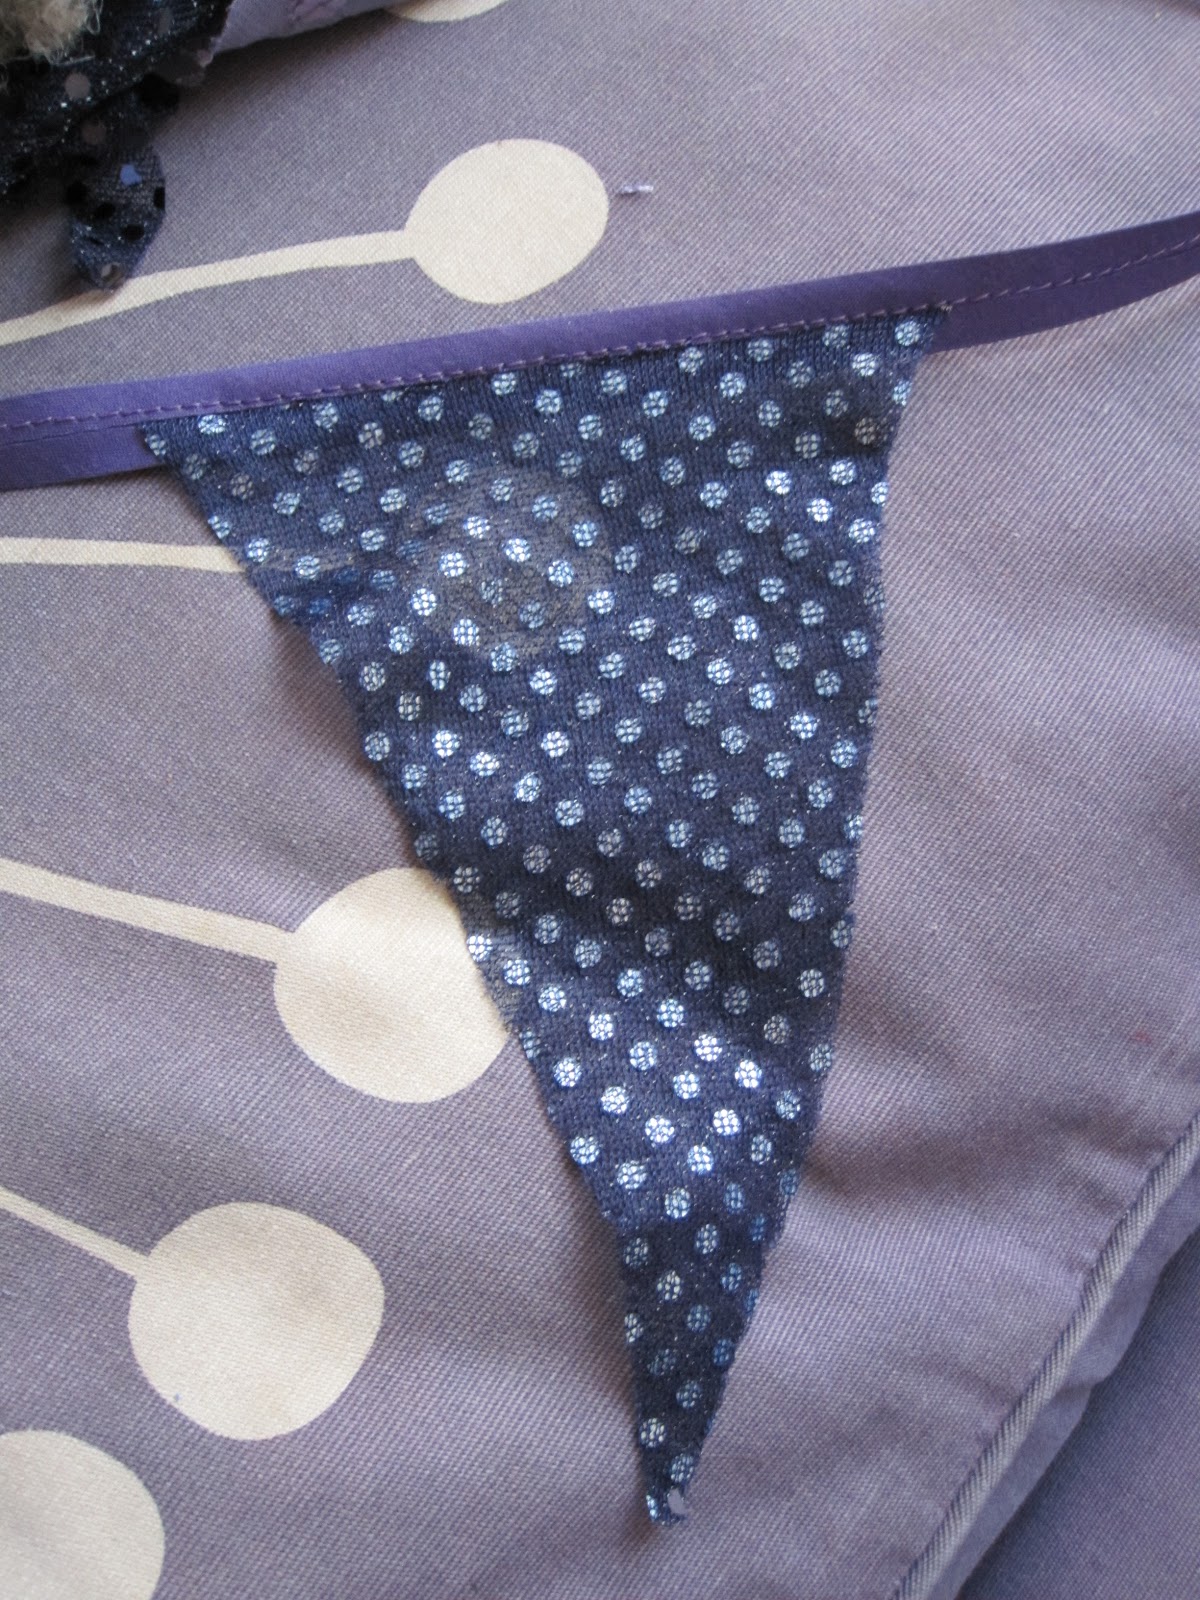
Christmas is coming! The geese are getting fat etc. We should be putting up our decorations soon, and to increase the amount we have (for some reason everytime you get decorations back out again there seems to be less of them..) I decided , based on too much time spent on Pinterest (for all those who have not yet experienced Pinterst, only click on the linbk of you are prepared to lose a lot of time to it, sooo addictive) to make some bunting! We have a long hall in the flat, and the bunting should liven it up nicely. I have made 1 string so far, and I am going to make another.
Now there are loads of tutorials on-line, but a fair number of them involved more work than I was planning on. I guess if you are making the bunting for a child's bedroom, or outside, or more long term, or you are far more detail oriented than I am, you might want to hem the flags, but it didn't seem necessary for our Christmas decks. I therefore came up with a basic hybrid version. I cut the flags out of jolly purple and white material (that's the colour our other stuff is) that I got out of the remnant bin at Edinburgh Fabrics. I have to say that bunting is super fabric efficient, I got about half a yard of each and I could probably make enough bunting to cover most of Edinburgh! I then sewed it on to some bias binding. This part was extremely satisfying, I just put the top of the flag under the top fold of the bias, and sewed it in. It therefore looks super neat on the front and back, for no effort whatsoever!
Thursday, 1 December 2011
Oooh, what a good idea
Now, when it comes to inspiration in the blog world, I am not hugely adventurous. I tend to think the same things are nice all the time, and not really consider how I could adapt other people's ideas into stuff for myself if they aren't my usual thing.
Case in point, I am always seeing people's ideas for refashioning the endless T-shirts they own which they feel are a bit blah, embellishing, chopping about, and turning into dresses. My reaction to these has always been- "spare T-shirts-what spare T-shirts?" I can never find T-shirts I like, which are long enough for not continually riding up to my waist showing off the muffin top and tummy, or so long they are dresses. More importantly, when I do, they always end up shrinking over time to be too short. So I never have spare T-shirts.
But then I saw a post on the Refashion Co-op by Amy (her first post-so welcome!) where she mentioned that when her daughter grew so her tops were too short she sewed them onto skirts and made dresses..... a light bulb clicked! Now I am sure I have seen many people sew skirts onto t-shirts before but it was always phrased in the "spare T-shirts" category, which I never felt applied to me- but "too short T-shirts" -YES! I hate fitting my upper half, and doing fiddly sleeves and necks and stuff, and I have several tops which have all this pre done! (obviously I wont bother with the classic 'too short and now oddly wide' ones).
So that is now my plan, especially for a top I wore the other day which drove me mad riding up. So.. ideas..
Amy sewed on a quick gathered skirt for hers, which is not going to work for me that simple. But it's very cute, with its colour matching from the yellow on the skirt and top.
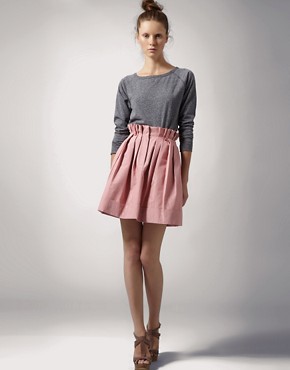
There is the classic, 'just sew on a skirt and make it look like seperates where the top doesn't ride up' approach so it looks more like this.
Anthropologie has this multi knit version-perhaps I could attach tops to other knit items...
I shall have to see what I can quickly whip up! (I will add it to my list....)
Case in point, I am always seeing people's ideas for refashioning the endless T-shirts they own which they feel are a bit blah, embellishing, chopping about, and turning into dresses. My reaction to these has always been- "spare T-shirts-what spare T-shirts?" I can never find T-shirts I like, which are long enough for not continually riding up to my waist showing off the muffin top and tummy, or so long they are dresses. More importantly, when I do, they always end up shrinking over time to be too short. So I never have spare T-shirts.
But then I saw a post on the Refashion Co-op by Amy (her first post-so welcome!) where she mentioned that when her daughter grew so her tops were too short she sewed them onto skirts and made dresses..... a light bulb clicked! Now I am sure I have seen many people sew skirts onto t-shirts before but it was always phrased in the "spare T-shirts" category, which I never felt applied to me- but "too short T-shirts" -YES! I hate fitting my upper half, and doing fiddly sleeves and necks and stuff, and I have several tops which have all this pre done! (obviously I wont bother with the classic 'too short and now oddly wide' ones).
So that is now my plan, especially for a top I wore the other day which drove me mad riding up. So.. ideas..
Amy sewed on a quick gathered skirt for hers, which is not going to work for me that simple. But it's very cute, with its colour matching from the yellow on the skirt and top.
There is the classic, 'just sew on a skirt and make it look like seperates where the top doesn't ride up' approach so it looks more like this.
Anthropologie has this multi knit version-perhaps I could attach tops to other knit items...
I shall have to see what I can quickly whip up! (I will add it to my list....)
Labels:
dress,
inspiration,
tops
Monday, 28 November 2011
Hooray!
No pictures yet, but I can inform you that the Glee dress is finished! Only a year in the making, and 8 blog mentions later..
Labels:
dress,
Glee dress
Friday, 25 November 2011
The Joan Process Dress, and how to draft darts on a dressform
One of the main reasons I was inspired to start sewing was my inability to get the clothes I wanted that fit me. the sort of dresses I had in mind were very fitted and brightly coloured and vintage in character. Lets face it, like pretty much every one else on the planet, I wanted to be Joan Holloway. She just wears such a stunning selection of fabulous form fitting clothes in gorgeous jewel tones.
Now I hate FBAs. They always seems to end up more trouble than they are worth, you faff and faff and it fits just as badly when you are done (this may just be me!). Luckily it can be all much more straightforward if you cut out the middle process and just fit on your body or a dress form. To do this, I extended parts of the pattern for the front before I cut it out. I added a little bit on at the waist (as I don't wear a corset) and then 1.5 inches at sides level with the bust (the amount the width was too small plus a bit) and added an additional3 inches to the length (in addition to the 3 inches for the overall length change as I did on the back). (If you zoom in on the image here you will be able to see what I did (the orange notes were reminders for me of how much I added)
Pin the middle of the bodice so that it doesn't slip around.
Of course, being me, despite sewing, I have still not made anything remotely like this. Until now! When out with Hannah I picked up some lovely bright blue jersey (called Process Blue in the Pantone system apparently) to have a stab at a Joan dress.
The pattern I am using is one that I found in a bulk ebay order a while ago-in my size! Woman W400, a slim fitted dress for knits. I was particularly drawn to it as the lady has it in such a bright green.
After my slightly disastrous prewashing, I cut out the pieces. I have bought a lot so that I can recut the front bodice if it all goes wrong. I cut out the skirt, back and sleeves as the pattern, but added 3 inches of length to the back bodice, as getting the waist in the right place is always worth checking.
Now I hate FBAs. They always seems to end up more trouble than they are worth, you faff and faff and it fits just as badly when you are done (this may just be me!). Luckily it can be all much more straightforward if you cut out the middle process and just fit on your body or a dress form. To do this, I extended parts of the pattern for the front before I cut it out. I added a little bit on at the waist (as I don't wear a corset) and then 1.5 inches at sides level with the bust (the amount the width was too small plus a bit) and added an additional3 inches to the length (in addition to the 3 inches for the overall length change as I did on the back). (If you zoom in on the image here you will be able to see what I did (the orange notes were reminders for me of how much I added)
To be clear at this point, I have put the bodice on the correct way round, as I am making a pattern piece off this. If I am just going to sew it up, if I am doing a refashion for example, or its all going to be very fiddly, I put it on inside out, and then once you have pinned everything you can just sew it up.
I pinned the side seams at the bottom and top, leaving the bit that might be a side dart loose. I then assessed the back and arm hole bits to see if the rest fits. The back on mine is a little bunchy, and the arm hole is folding oddly, so will need to be included in the dart to take the excess out.
I then just pinched out the extra material to make the side dart. I am just trying to remove the excess from the extra length of the material at the side where it doesn't have to go over any boob. I am being careful here because it is a stretch material. As you can see I have pulled out some of the excess in the arm pit area and hence adjusted the bit at the top of the side seam I pinned at the start. (if you make big adjustments to this area remember so you can make corresponding changes to the sleeve). Pin along the seam, but use a pin to note where you want the point of the dart to end.

Do the same on the other side, it doesn't have to be exactly the same, but it should look the same on the body. If you are doing a muslin you can just do half and then repeat on the pattern. If you are not, you need to match the bust points and the direction of the dart so it doesn't look wonky.
The area below the bust is still all baggy as you no longer need at the width of material at this point.
Pin the middle of the bodice so that it doesn't slip around.
Then just pinch out the dart as you need.
Once you have done both sides, you need to mark on where the waistband should be. Some people mark the waist on the dress form but I find it more useful to have the markings on the outside of the clothes I am making. I have a big piece of elastic that I just use like a belt so I can see how it will sit on the body.
Once you have all this, mark on your lines with chalk, or baste along the seams if easier.
Then take it off and unpin it, and lay your fabric over the paper pattern piece. Poke through with a pin along all the seams and then when you remove the fabric, you will have pin marks in the paper you can join together to mark your darts on the pattern.
Now I just have to sew up the darts and then move on to the rest of the dress!
Labels:
dress,
dress form,
inspiration
Thursday, 24 November 2011
I may have created a monster!
Well I taught Hannah how to make a skirt-and it went really well! I think she may be a natural, by the end she was sewing with far more control of the pedal speed than I manage! (I just tend to bash it down and go full speed-frequently in the wrong direction!)
I made a substantial (accidental!) effort to show her that mistakes happen and can be easily fixed-there were several mistakes-all of them mine! I caught some material in under the bit I was sewing round the zip, and had to seam rip it, and we cut out the pieces of the waistband the wrong way up on the fabric (should have turned the pattern pieces over) but luckily on this pattern that doesn't matter at all. My major error however, was just me being a complete idiot (seems to be a theme with this skirt!) as I carefully bought some nice fusible interfacing, but when I tried to iron it on it wasn't sticky..doh! I had got the non fusible kind. It was fine as it gave Hannah a chance to practice sewing on none visible seams so all was well. Only it wasn't-as when we came to iron the first proper seam, I realised that I had not plugged the iron in properly. So it was fusible... and I had just sewed it into a piece I had to iron, with the fusible side up. sigh. It was fine however, and once the whole thing was assembled it will have all stuck itself together nicely!
Barring my errors however it went extremely well. My first proper project was a bit of a trial, and somewhat demoralising. I was keen that this wouldn't be for Hannah. She was extremely excited and seems to have the bug well and truly! We had a nice rummage through all my patterns and fabric getting overexcited! By far the triumph of the skirt was the pattern matching. I didn't even try to match the pattern as we cut it, I am not very good at that sort of thing anyway and it would have made the cutting out stage last forever and been unduly scary. But without any effort at all the front waistband matches almost exactly, and the sides and back make pretty chevrons! We had made the decision to just cut the front on the fold rather than as two pieces so we didn't have to match that, but I was slightly gobsmacked at how well it turnd out!
I made a substantial (accidental!) effort to show her that mistakes happen and can be easily fixed-there were several mistakes-all of them mine! I caught some material in under the bit I was sewing round the zip, and had to seam rip it, and we cut out the pieces of the waistband the wrong way up on the fabric (should have turned the pattern pieces over) but luckily on this pattern that doesn't matter at all. My major error however, was just me being a complete idiot (seems to be a theme with this skirt!) as I carefully bought some nice fusible interfacing, but when I tried to iron it on it wasn't sticky..doh! I had got the non fusible kind. It was fine as it gave Hannah a chance to practice sewing on none visible seams so all was well. Only it wasn't-as when we came to iron the first proper seam, I realised that I had not plugged the iron in properly. So it was fusible... and I had just sewed it into a piece I had to iron, with the fusible side up. sigh. It was fine however, and once the whole thing was assembled it will have all stuck itself together nicely!
Barring my errors however it went extremely well. My first proper project was a bit of a trial, and somewhat demoralising. I was keen that this wouldn't be for Hannah. She was extremely excited and seems to have the bug well and truly! We had a nice rummage through all my patterns and fabric getting overexcited! By far the triumph of the skirt was the pattern matching. I didn't even try to match the pattern as we cut it, I am not very good at that sort of thing anyway and it would have made the cutting out stage last forever and been unduly scary. But without any effort at all the front waistband matches almost exactly, and the sides and back make pretty chevrons! We had made the decision to just cut the front on the fold rather than as two pieces so we didn't have to match that, but I was slightly gobsmacked at how well it turnd out!
| can you see the waistband seam-I can't! |
Monday, 21 November 2011
hmmm - need to think before i wash..
This weekend me and my future sister in law went fabric shopping. Hannah wants to make her own clothes so I am going to teach her! (I am quite excited!). We decided that her first project should be a Ginger skirt, as it is fairly simple but looks good when done. We will be using a normal zipper rather than invisible, not because I think she can't handle it, but because I don't seem to be able to get my invisible zipper foot to work recently. I think in any case a normal zipper will be more helpful in explaining itself (I always find invisible ones a bit counter-intuitive somehow..).
So we went to find fabrics, checking out the Aladdin's cave that is Edinburgh Fabrics, and going gushy over the bright designer patterns in John Lewis (followed by snooping round the new Anthropologie shop!). I think it is very safe to say that we will not be good influences in terms of restraining each other's fabric buying! Hannah got some lovely purple and yellow spotty cotton, and I splurged on some pink Martha Negley flowery cotton and bright blue double knit. I then carefully told Hannah to wash her fabric before we sewed with it, like the wise sewing sage that I am. Or not as it turns out, as I then popped my own fabrics in to wash together and never thought that bright blue fabric might not be entirely colour fast yet... So now I have slightly purple flowers on a pale blue background...I will give it another wash later and hopefully some of it will come back out, though I don't really mind-it is still very pretty! But not clever.
![]() |
| before the bluing.. |
Subscribe to:
Posts (Atom)